
Cape Cod Outdoor Shower Ideas and Costs: Enclosures, Floors, and Drainage
· By Daniel Ferreira
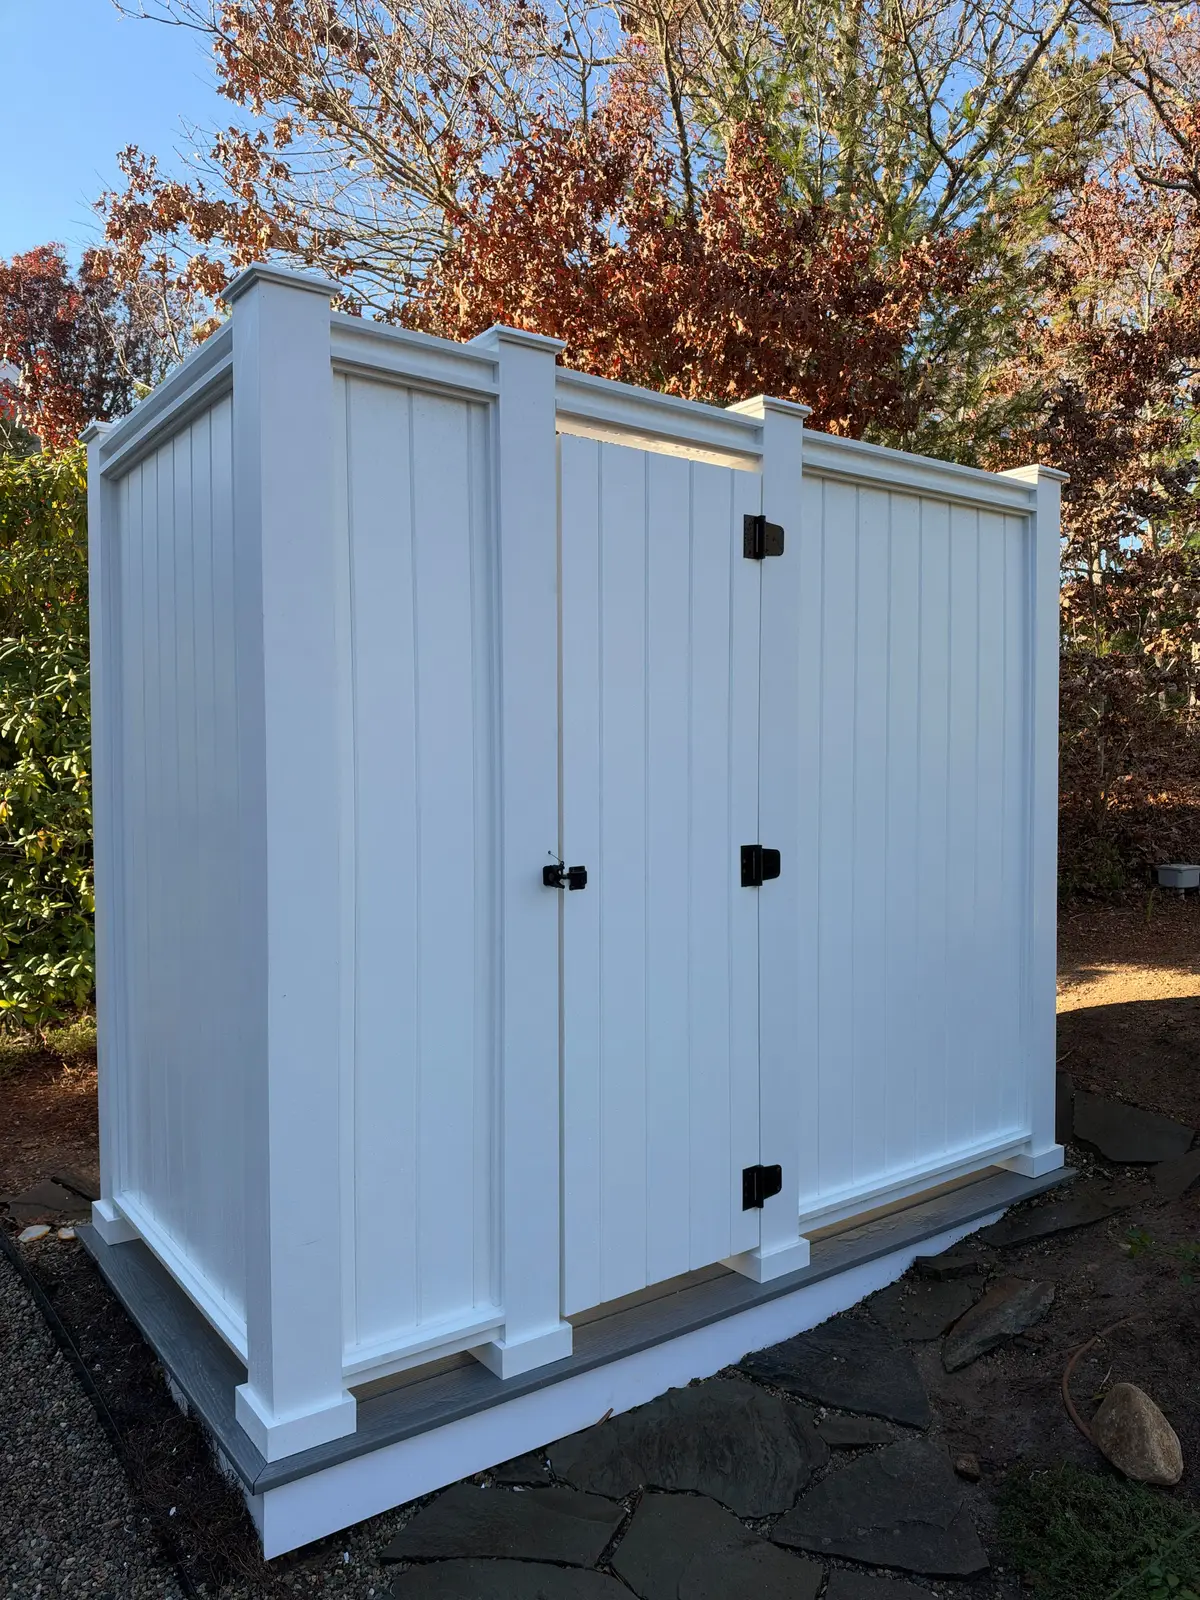
Few things say summer on Cape Cod like an outdoor shower. Rinse off after the beach, keep sand out of the house, wash the dog, and enjoy a hot shower under the open sky on a July evening. For many homeowners it becomes the most used feature of the whole yard, and for rental properties it is one of the amenities guests ask about most.
A good outdoor shower is more than a showerhead on the side of the house, though. Privacy, materials, water supply, drainage, and winterizing all need to be planned. This guide covers the most popular outdoor shower ideas on the Cape, what they typically cost, and the details that make one last for years.
Popular outdoor shower layouts
The most common setup on the Cape is an enclosure built against the side or back of the house, close to existing plumbing. It shares one wall with the home and has three walls with a door. This is usually the most practical and budget friendly option because the water lines are short.
Freestanding enclosures sit out in the yard, often near a pool, a garden path, or the route back from the beach. They feel more private and resort like but need longer water lines and their own footings. Some homeowners also add a small changing area next to the shower stall, with a bench and hooks, which is handy on rental properties and for families coming back from the beach.
Open showers with just a privacy panel or two work for a quick rinse by the pool. They cost less but offer less privacy, so they suit spaces that are already screened from neighbors.
Enclosure materials: vinyl, cedar, or composite
White vinyl enclosures have become a favorite on Cape Cod because they hold up to constant moisture without rotting, never need painting, and match the white trim on so many shingle style homes. They clean up with soap and water and pair well with black hardware for a crisp, modern look.
Cedar is the classic choice. It looks beautiful, smells great, and weathers to a soft gray that suits older Cape houses. The trade-off is upkeep: cedar needs occasional cleaning and sealing to slow mildew and wear in a space that stays wet. Composite or PVC panels sit in between, offering a wood look with less maintenance.
Flooring that drains and stays safe
The floor matters more than people expect. Composite deck boards are a popular choice because they do not rot, feel good underfoot, and let water drain through the gaps. Wood slats work too, though they need more care. Stone, pavers, or a gravel bed under a slatted floor can also work depending on drainage.
Whatever you choose, the floor should be slip resistant, sit slightly above the ground for airflow, and let water move away quickly so it does not puddle or stay damp.
Water, plumbing, and drainage
Most outdoor showers on the Cape use both hot and cold water, which means tying into the home's plumbing. Water lines should be planned so they can be drained before winter, because a frozen pipe in an outdoor shower is one of the most common spring surprises. A licensed plumber handles the plumbing connections.
Drainage is the other half. Water needs somewhere to go, whether that is a gravel bed, a dry well, or another approach your town allows. Rules on outdoor shower drainage can vary by town and by how close you are to wetlands or water, so it is worth checking with the local building and health departments early. Soap and shampoo choice also matters when water drains into the ground.
Typical outdoor shower costs
Prices vary widely with size, materials, and plumbing. As a general market range, a simple enclosure against the house with existing water nearby often starts somewhere in the low thousands of dollars, while a larger freestanding vinyl or cedar enclosure with a changing area, composite floor, and new hot and cold lines can run well beyond $10,000.
The biggest cost drivers are the distance to the water supply, whether hot water is included, the enclosure material and size, the floor, the drainage solution, and extras like a bench, shelves, hooks, lighting, or a second showerhead. A site visit is the best way to see what your yard needs and get a real price.
Small details that make a big difference
A few finishing touches turn a basic shower into one you love using: hooks and a bench for towels and clothes, a shelf for soap, a door latch you can operate with wet hands, good venting at the top for light and airflow, and gaps at the bottom so the enclosure dries quickly. Black hardware against white vinyl is a popular look right now.
Location matters too. Think about the path from the beach or pool, whether neighbors can see in, morning versus evening sun, and how close it is to doors so you are not tracking water through the house. DFA Carpentry has built many vinyl outdoor showers on Cape Cod homes and can help you think through the layout on site.
Frequently asked questions
- Does an outdoor shower need a permit on Cape Cod?
- It depends on your town and the plumbing and drainage involved. New plumbing usually needs a plumbing permit, and some towns have rules about drainage. Check with your town before building.
- How do I winterize an outdoor shower?
- Shut off the water supply to the shower, open the valves, and drain the lines before the first hard freeze. A shutoff inside the house and drainable lines make this a five minute job.
- Is vinyl or cedar better for an outdoor shower?
- Vinyl is the low maintenance choice and will not rot or need paint. Cedar has a classic look but needs more care in a wet space. Both are common on Cape Cod.
- Can I add an outdoor shower to my deck?
- Often, yes. A shower can be built at the edge of a deck or below it, but the deck has to be planned for water and drainage so the framing stays dry.
Related services
Ready for an exact price?
Get a free, no-pressure in-home estimate. Real numbers for your home, not a phone guess.